

How To Repair A Window Sill
Past Rob Robillard
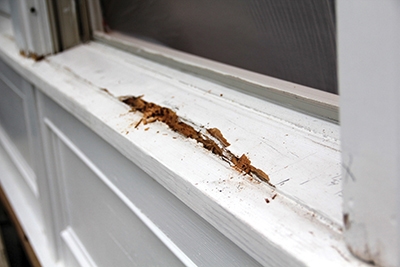
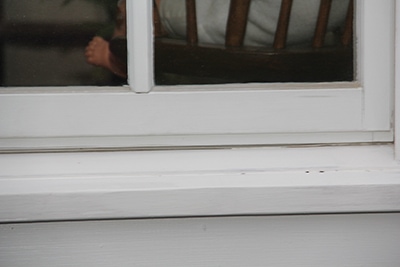
Wood windowsills take a beating from Female parent Nature. Although sloped by design, a windowsill is however basically a horizontal shelf where water and snowfall can accumulate. Once h2o finds its manner backside trim or below paint and caulk, the rot procedure begins. Ongoing exposure to this moisture will cause the windowsill to decay and worsen over time. When caught early on, ofttimes a small-scale epoxy repair is all that is needed. But when discovered belatedly or left unchecked, the rot will penetrate deeper into the windowsill and fifty-fifty the wall framing, requiring much more extensive and more expensive repair afterward.
Repair or Replace
The historic period-former debate of window replacement or window repair is a tough one to answer, but I'll explicate how I effort to guide my client's decision process.
I wait at the repair versus the replacement question as a business approach. What makes the nigh sense; based on time, upkeep longevity, and of course hidden costs.
When dealing with old historic windows, often times repairing is the but option. Many times these windows are protected past a city or town's historic commune commission specifying that the window details remain unchanged. Frequently times, replacement requires having a custom and costly window fabricated to lucifer the style, expect and dimensions of the existing old windows.
Other circumstances where repairing may exist an option is on college-terminate homes with large expensive units, bay windows or multiple mulled windows. Many times these windows will have high-end trim, wainscoting or fake wall finishes that would add a multitude of extra costs if the window is replaced.
I frequently opt for window replacement when the cost of the window, any interior work relating to the replacement and my replacement labor are equal to or less than the fourth dimension I'd spend performing a quality repair. I often encounter this as a realistic option on more than mod homes when dealing with stand-alone window units and elementary interior finishes and trim.
Replaceable Sill Nosing
Sometimes a windowsill has rot on the outer nosing just. Many newer windows actually have removable nosing that can hands be duplicated and replaced with Western Red Cedar, Mahogany or PVC. Others are designed as 1 piece and need to be cut away and patched.

Installing a Dutchman Patch
Dutchman patches are known primarily in carpentry, furniture-making and masonry. A Dutchman is a slice of wood or stone that is used to repair a larger piece, shaped and so that it fills a void. In our case nosotros cutting the void and patched it with new forest—a Dutchman patch.
If windowsill rot is bars to just a small expanse, a simple patch and fill up is all that is needed. For larger sections of impairment, well-nigh or all the windowsill may need to be removed and replaced.
When performing a Dutchman repair we like to utilise Western red cedar or Mahogany for the patch. Both forest species have inherent insect- and rot-resistant qualities.
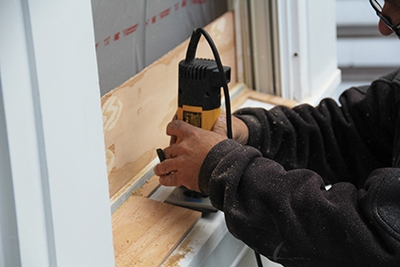
Use a Router to Cut Out Rot
We use a compact router and guide to cut our Dutchman patch because using anything else does not provide a straight enough line for a tight gum joint.
A router kicks up a lot of saw-dust, and so sealing off the window is a must.
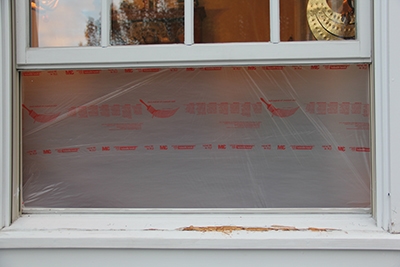
Dust Prevention
Prior to cutting out the rot you will demand to take precautions to proceed sawdust from entering the house. Nosotros use a product chosen Tape & Drape, a pre-taped masking flick that unfolds to cover and protect diverse surfaces while painting.
We so utilise painter's tape to completely seal off the sides of the plastic, on the inside of the window, and then enhance the lower sash to provide access to cutting the sill with a router. This process ensures a dust-free house interior.

Straight Edge to Guide the Router
In order for whatever tool to cut straight y'all demand to use a guide. Nosotros use quarter-inch plywood as our router guide, making the guide with a table saw and miter saw.
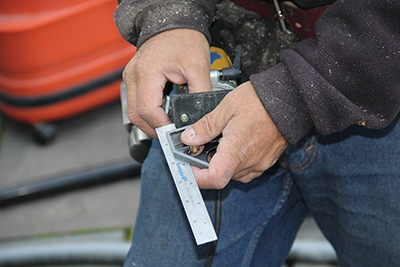
Once nosotros determine where the rot ends and solid wood begins, we use that measurement plus the width of our router base to determine what size router guide we need. Small
4-penny stop nails concord the guide in place, and these holes are afterwards filled with epoxy.
Cutting the Dutchman Hole
We set our "straight cut" router bit to cut approximately 3/8 inch deep all the manner effectually. Nosotros then added small 1-inch strips to all template sides of the router guide and used the router to make a "stepped dorsum cut," cut completely through the window sill. This takes several passes, each fourth dimension deepening the router cut.
Nosotros use this "stepped method" to increase our gluing surface and to provide a shelf for the Dutchman patch to index into and rest on.
Smaller Rot Sections
When presented with smaller rot circumstances, not as deep, we only rout deep enough to eliminate the rot and cut into solid wood.
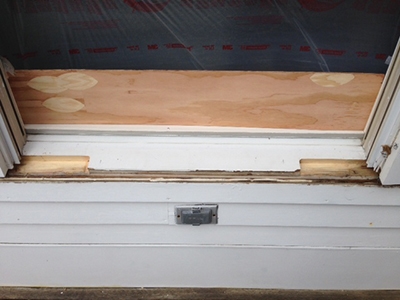
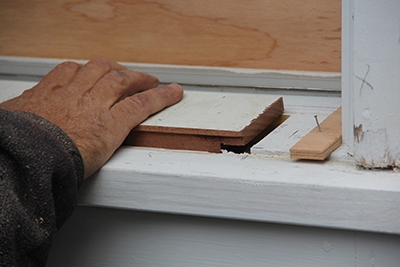
Prepare for the Patch
Once the routing is completed we vacuum the entire expanse and inspect the framing sub-sill for damage. If rotting, we may end upward removing the window after all. If not, the repair continues.
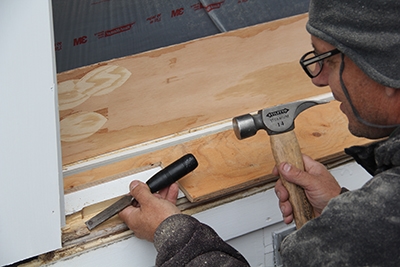
We use a chisel to foursquare off the corners of the hole later on routing. The Dutchman patch is cut on a table and miter saw to ensure foursquare corners.
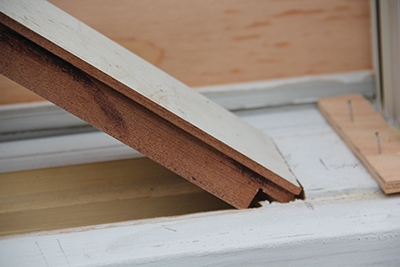
Cutting the Dutchman Patch
We and so accept measurements and notes to make our solid Dutchman patch on the table saw. The router rode forth the sill, sloped 12 to 15 degrees, so we effort to match the bending on our patch.
We duplicate this gradient with the intent of getting all the sides of the new patch to touch all the sides of the hole in the sill. This takes time to get right and ensure that we take a tight "dry fit" patch. Cut the patch into shape with intersecting rip cuts to create the stepped key issue.

Gluing the Patch
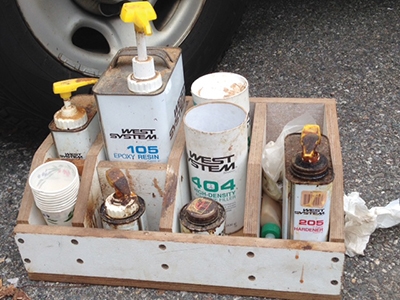
Once nosotros have a solid dry out fit with tight joints we mix up our epoxy.
We use West System epoxy, a versatile ii-part, marine-class epoxy that bonds and coats fiberglass, forest, metal, fabrics and other composite materials to provide superior strength and moisture resistance.
The epoxy was designed for boatbuilding and repair and works slap-up on windowsills, columns and other areas where gluing, filling and shaping are needed.
We utilize the epoxy in two ways, every bit mucilage and equally filler. First we brush on the epoxy to all wood surfaces and then tap in the slice. It swells a scrap, and a gentle hammer-tap against a wood block is needed to get the Dutchman in place.
In one case in position, clench it or utilise a few well-placed stop nails hold it until the epoxy dries—usually 8 to 24 hours.
Fill up Any Voids
Once the patch is installed, we mix up a batch of epoxy with structural filler to fill and overlap the seams of the patch and whatsoever boom holes created during the repair.
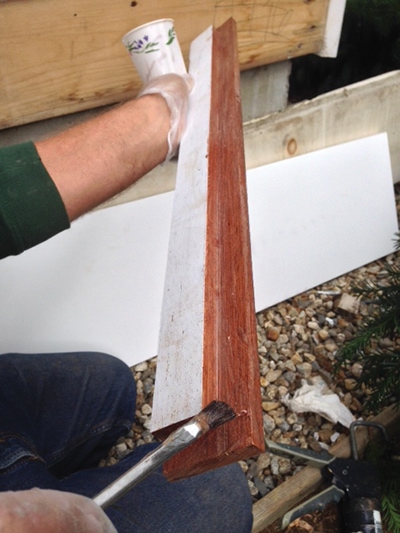
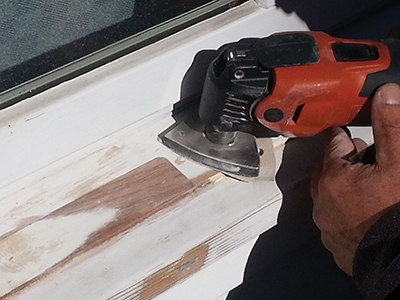
Sand Patch
We look 24 hours before sanding the patch and applying a quality oil primer to the unabridged windowsill. The painter will follow us with additional primer and two-coats of paint.
Editor's note: Rob Robillard is a professional person remodeling contractor and blogger at www.aconcordcarpenter.com.
Source: https://extremehowto.com/patching-rotted-window-sills/
0 Response to "How To Repair A Window Sill"
Post a Comment